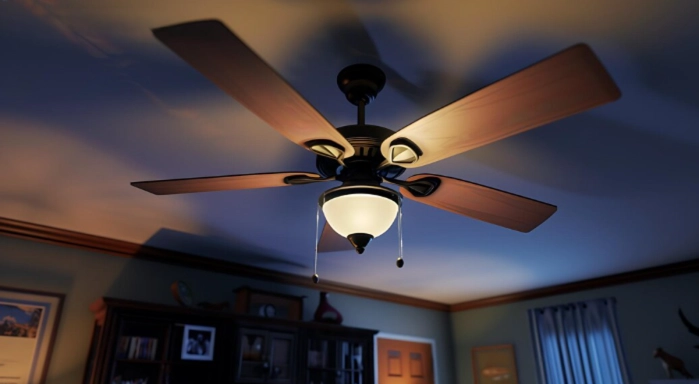
Ceiling fans with lights are a great addition to any home. They provide cool air circulation and proper lighting at the same time, making them both practical and energy-efficient. Many homeowners install ceiling fans in bedrooms, living rooms, and dining areas to improve comfort while reducing energy costs.
According to the U.S. Department of Energy, using a ceiling fan can make a room feel up to 4°F cooler, which allows homeowners to reduce air-conditioning use and save energy. Modern ceiling fans with LED lights also consume significantly less electricity compared to traditional lighting.
In this guide, you will learn what ceiling fan wiring is, the tools required, and step-by-step instructions to wire a ceiling fan with lights safely and correctly.
What Is a Ceiling Fan With Light?
A ceiling fan with light is a fixture that combines two functions:
-
Air circulation through fan blades
-
Lighting through built-in bulbs or LED fixtures
Most ceiling fans are controlled using:
-
One switch (fan and light together)
-
Two switches (fan and light separately)
-
Remote control systems
These fans are commonly used in:
-
Bedrooms
-
Living rooms
-
Dining rooms
-
Offices
-
Covered patios
Why Install a Ceiling Fan With Lights?
1. Energy Efficiency
Ceiling fans help reduce the need for air conditioning.
2. Two Functions in One Fixture
They provide cooling and lighting in a single unit.
3. Space Saving
Instead of installing a fan and a separate light fixture, you get both together.
4. Improved Air Circulation
They distribute air evenly throughout the room.
Ceiling Fan Energy Savings (Example)
| Appliance | Average Energy Use | Energy Saving Potential |
|---|---|---|
| Traditional Ceiling Light | 60–100 watts | Higher energy use |
| LED Ceiling Fan Light | 10–20 watts | Up to 80% less energy |
| Air Conditioner | 1500–3500 watts | High energy consumption |
| Ceiling Fan | 50–75 watts | Low energy usage |
Example:
If you run a ceiling fan instead of lowering the AC temperature, you can reduce cooling costs by up to 10–15% during summer months.
Tools and Materials You Need
Before starting the wiring process, gather these tools:
-
Ceiling fan with light kit
-
Screwdriver
-
Voltage tester
-
Wire connectors (wire nuts)
-
Electrical tape
-
Ladder
-
Pliers
-
Mounting bracket
Having all tools ready will make the installation process easier and safer.
Ceiling Fan Wiring Color Guide
Understanding wire colors is important before connecting them.
| Wire Color | Purpose |
|---|---|
| Black | Fan power (hot wire) |
| Blue | Light power |
| White | Neutral wire |
| Green or Copper | Ground wire |
This wiring system helps control the fan and light separately or together.
Step-by-Step Guide to Wiring a Ceiling Fan With Lights
Step 1: Turn Off the Power
Safety should always come first.
-
Turn off the electricity at the main breaker panel.
-
Use a voltage tester to confirm that no electricity is flowing.
This prevents electrical shock during installation.
Step 2: Install the Ceiling Fan Mounting Bracket
Most ceiling fans come with a mounting bracket.
Steps:
-
Attach the bracket to the electrical ceiling box.
-
Make sure the box is fan-rated (able to support the weight of a fan).
-
Tighten the screws firmly.
Step 3: Identify the Ceiling Wires
Inside the ceiling electrical box, you will usually see:
-
Black wire (power)
-
White wire (neutral)
-
Green or copper wire (ground)
These wires will connect to the wires from the ceiling fan.
Step 4: Connect the Ground Wires
Ground wires protect against electrical faults.
Steps:
-
Connect the green fan wire to the bare copper or green ceiling wire.
-
Secure them using a wire connector.
Step 5: Connect the Neutral Wires
Next, connect the neutral wires.
-
Join the white fan wire with the white ceiling wire.
-
Secure the connection with a wire nut.
Step 6: Connect the Fan and Light Wires
Now connect the power wires.
For single switch control:
-
Connect black (fan) and blue (light) wires together with the black ceiling wire.
For dual switch control:
-
Black ceiling wire → fan (black wire)
-
Red ceiling wire → light (blue wire)
Secure all connections using wire connectors.
Step 7: Secure the Fan to the Ceiling
Once wiring is complete:
-
Carefully tuck the wires inside the electrical box.
-
Attach the fan motor to the mounting bracket.
-
Tighten all screws securely.
Step 8: Install the Light Kit
Most ceiling fans include a light fixture.
Steps:
-
Attach the light kit to the fan base.
-
Install the light bulbs or LED module.
-
Secure the light cover.
Step 9: Turn the Power Back On
Finally:
-
Turn the breaker back on.
-
Test the fan and lights using the wall switch or remote.
If wired correctly, the fan and light should work smoothly.
Real Example of Ceiling Fan Installation
A homeowner replaced a traditional ceiling light with a ceiling fan with LED lights in their bedroom.
Results:
-
Room temperature felt 3–4°F cooler
-
Lighting energy use dropped by about 60%
-
Improved air circulation and comfort
This shows how a ceiling fan can improve both energy efficiency and home comfort.
Common Wiring Mistakes to Avoid
1. Not Turning Off the Power
Always turn off the breaker before working with wires.
2. Mixing Up Wire Colors
Incorrect wire connections can prevent the fan or lights from working.
3. Using a Weak Electrical Box
A ceiling fan requires a fan-rated electrical box to support its weight.
4. Loose Wire Connections
Loose wires can cause flickering lights or fan malfunction.
Pro Tips for Better Installation
- Use LED bulbs for energy efficiency
- Install a dimmer or fan speed control switch
- Choose the correct fan size for the room
- Balance the fan blades to prevent wobbling
Conclusion
Wiring a ceiling fan with lights may seem complicated, but with the right tools and proper steps, it can be a manageable DIY project. By understanding the wiring colors and following safe installation practices, homeowners can successfully install a ceiling fan and improve both lighting and air circulation in their homes.
Ceiling fans offer energy savings, better airflow, and modern functionality, making them a valuable upgrade for any room. With careful planning and safe wiring, you can enjoy a comfortable and well-lit space in no time.
FAQs
1. Can I wire a ceiling fan with lights using one switch?
Yes, you can wire a ceiling fan with lights using a single switch. In this setup, the fan wire (black) and light wire (blue) are connected to the same power wire so both turn on together.
2. Can a ceiling fan and light be controlled separately?
Yes. If your ceiling has two switches, you can control the fan and light separately by connecting the fan wire to the black wire and the light wire to the red wire from the ceiling.
4. Do I need a special electrical box for a ceiling fan?
Yes, A fan-rated electrical box is required because ceiling fans are heavier than regular light fixtures and need strong support to prevent accidents.
5. Is it safe to wire a ceiling fan yourself?
Yes, many homeowners can install and wire a ceiling fan if they follow proper safety steps such as turning off the breaker, using a voltage tester, and following the wiring instructions carefully. If you are unsure, hiring a licensed electrician is recommended.
6. How long does it take to wire a ceiling fan with lights?
For most DIY installations, wiring and installing a ceiling fan with lights takes about 1–2 hours, depending on the wiring setup and installation difficulty.
7. Can I replace a regular light fixture with a ceiling fan?
Yes, you can replace a standard ceiling light with a ceiling fan, but you must ensure the electrical box is fan-rated and properly secured to support the fan’s weight.
8. Do ceiling fans with lights save energy?
Yes. Ceiling fans improve air circulation and allow homeowners to raise the thermostat by about 4°F, which can reduce cooling costs by 10–15% during warmer months.

