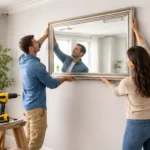
How to Install Can Lights in the Ceiling (Step-by-Step Guide)
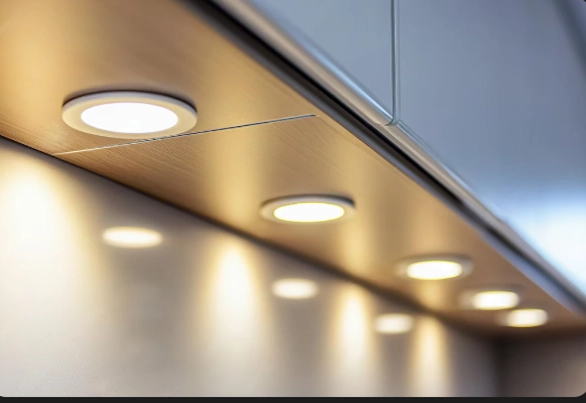
Can lights, also known as recessed lights, are a popular lighting choice for modern homes. They are installed inside the ceiling so only the trim and light are visible, giving rooms a clean and stylish look. Many homeowners use them in kitchens, living rooms, bathrooms, and hallways because they provide bright and even lighting without taking up space.
According to the U.S. Department of Energy, switching to LED recessed lighting can reduce lighting energy use by up to 75% compared to traditional incandescent bulbs. This makes can lights both stylish and energy-efficient.
In this guide, you will learn what can lights are, why they are useful, and how to install them in your ceiling step by step.
What Are Can Lights?
Can lights (recessed lights) are light fixtures that are installed inside the ceiling. Instead of hanging down like a chandelier or pendant light, they sit flush with the ceiling.
Key features of can lights:
-
Installed inside the ceiling
-
Provide clean and modern lighting
-
Save space
-
Work well with LED bulbs
-
Provide even light across a room
These lights are commonly used in:
-
Kitchens
-
Living rooms
-
Bathrooms
-
Hallways
- Offices
Step-by-Step Guide to Installing Can Lights
Step 1: Turn Off the Power
Safety comes first. Turn off the electricity from the breaker panel before starting any electrical work.
Use a voltage tester to make sure the wires are not live.
Why Install Can Lights?
Installing recessed lighting offers several benefits.
1. Modern and Clean Look
Since the lights are hidden inside the ceiling, they give rooms a minimal and elegant design.
2. Better Lighting Coverage
Multiple recessed lights can brighten a room evenly without dark spots.
3. Energy Efficiency
LED recessed lights use much less electricity. The U.S. Energy Information Administration reports that LED lighting now accounts for over 50% of residential lighting installations in many homes.
4. Saves Space
Unlike hanging lights, recessed lights do not take up headroom, making them ideal for smaller rooms.
Tools and Materials You Need
Before starting the installation, gather the following tools:
- Recessed (can) light kit
- LED bulbs
- Drill
- Hole saw or drywall saw
- Voltage tester
- Wire connectors
- Electrical cable
- Measuring tape
- Ladder
- Pencil for marking
Step-by-Step Guide to Installing Can Lights
Step 1: Turn Off the Power
Safety comes first. Turn off the electricity from the breaker panel before starting any electrical work.
Use a voltage tester to make sure the wires are not live.
Step 2: Plan the Light Placement
Good spacing ensures balanced lighting.
A simple rule used by electricians:
Divide the ceiling height by 2 to determine spacing.
Example:
If the ceiling is 8 feet high, lights should be about 4 feet apart.
Mark the spots on the ceiling with a pencil.
Step 3: Check the Ceiling Space
Before cutting the ceiling, make sure there are no:
-
Ceiling joists
-
HVAC ducts
-
Electrical wires
-
Pipes
Use a stud finder or small test hole to check the area.
Step 4: Cut the Hole in the Ceiling
Use the template provided with your recessed light kit.
-
Draw the circle on the ceiling.
-
Use a drywall saw or hole saw.
-
Carefully cut the hole.
Make sure the hole size matches the fixture.
Step 5: Run the Electrical Wiring
Run electrical cable from the power source (switch or existing fixture) to the new recessed light location.
Steps:
-
Feed the cable through the ceiling.
-
Leave enough wire hanging out of the hole.
-
Strip the insulation from the wires.
Step 6: Connect the Wires
Inside the recessed light junction box, connect the wires:
-
Black wire → black wire (hot)
-
White wire → white wire (neutral)
-
Green or copper → ground wire
Secure the connections using wire connectors.
Step 7: Install the Light Housing
Insert the recessed light housing into the ceiling hole.
Most modern recessed lights have spring clips that lock the fixture into the ceiling.
Push the clips until the fixture sits firmly.
Step 8: Install the Bulb and Trim
Once the housing is installed:
-
Insert the LED bulb
-
Attach the trim or cover
-
Make sure it fits flush with the ceiling
Step 9: Turn the Power Back On
Go back to the breaker panel and turn the power on.
Test the lights using the wall switch.
If everything is installed correctly, your new recessed lights should turn on immediately.
Real Example of Recessed Lighting Installation
A homeowner in California renovated their kitchen by replacing one ceiling light with six recessed LED can lights.
Results:
-
The kitchen became 40% brighter
-
Energy usage for lighting dropped by around 60%
-
The room looked larger and more modern
This shows how recessed lighting can improve both design and efficiency.
Common Mistakes to Avoid
When installing can lights, avoid these common errors:
1. Placing lights too close together
This can make the room overly bright.
2. Ignoring insulation type
If your ceiling has insulation, choose IC-rated recessed lights to prevent overheating.
3. Cutting the wrong hole size
Always follow the template from the fixture kit.
4. Not turning off electricity
This can cause serious injury.
Pro Tips for Better Lighting
-
Use LED recessed lights for energy savings.
-
Install dimmer switches to control brightness.
-
Combine recessed lights with accent lighting for better design.
-
Choose warm white (2700K–3000K) for living rooms and bedrooms.
Conclusion
Installing can lights in the ceiling is a great way to improve the lighting and style of your home. With the right tools and careful planning, many homeowners can complete this project themselves.
Recessed lights provide clean design, energy efficiency, and even lighting throughout a room. By following the steps above—planning the layout, cutting the ceiling hole, wiring the fixture, and installing the trim—you can successfully upgrade your home lighting.
If done correctly, recessed lighting can make your space brighter, modern, and more comfortable.
FAQs
1. Can I install can lights in an existing ceiling without attic access?
Yes, you can install recessed lights without attic access by using remodel or retrofit recessed light kits. These lights are designed to fit into existing ceilings and can be installed from below the ceiling.
2. How many can lights should I install in a room?
The number depends on the room size and ceiling height. A common rule is to divide the ceiling height by two to determine the spacing between lights for balanced lighting.
3. What type of bulb is best for recessed lighting?
LED bulbs are the best choice for recessed lights because they use less electricity, last longer, and produce less heat compared to traditional bulbs.
4. Do I need special recessed lights for insulated ceilings?
Yes. If your ceiling has insulation, you should use IC-rated recessed lights. These are designed to safely touch insulation without causing overheating or fire hazards.
5. How long does it take to install can lights?
Installing one recessed light usually takes 30 to 60 minutes depending on wiring complexity and ceiling access. Installing multiple lights may take a few hours.