Introduction
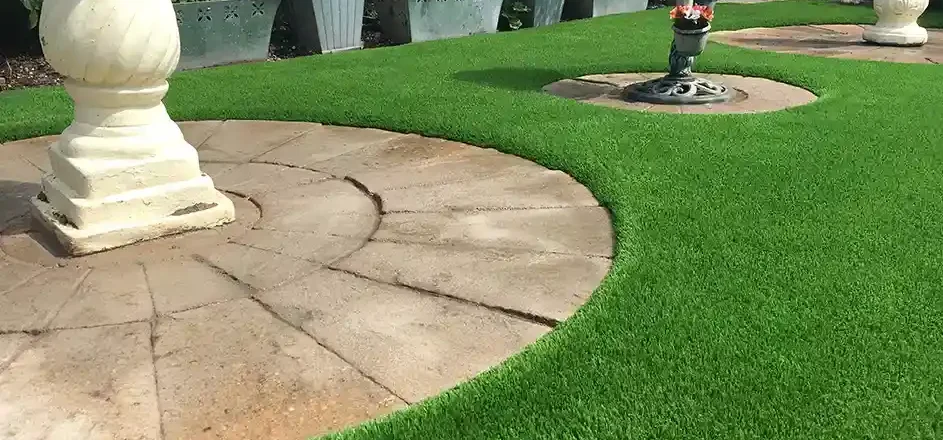
Imagine having a lush, green lawn all year round without watering, mowing, or fertilizing. That’s exactly why many homeowners are switching to artificial grass. Whether you want to upgrade your backyard, balcony, or garden, installing artificial turf can completely transform your outdoor space.
Artificial grass has become increasingly popular in recent years. In fact, industry reports estimate that the global artificial turf market is expected to exceed $6 billion by 2027, driven by demand for low-maintenance landscaping. The good news is that installing artificial grass is not as complicated as it may seem.
With the right tools and a clear step-by-step approach, even beginners can do it successfully.
Why Choose Artificial Grass?
Before diving into installation, it’s important to understand why artificial grass is becoming a top choice for homeowners. Unlike natural grass, synthetic turf stays green throughout the year and requires minimal maintenance.
Here are some key benefits of artificial grass:
- No watering or mowing required
- Saves time and maintenance costs
- Durable and long-lasting
- Pet and child-friendly options available
- Works well in small spaces like balconies and rooftops
According to landscaping studies, artificial grass can reduce outdoor water usage by up to 55%, making it an environmentally friendly option in many regions.
Artificial grass is becoming a popular choice for homeowners who want a beautiful lawn with minimal maintenance. If you’re interested in improving your living space with practical home solutions, visit New Home Essentials for more guides and inspiration.
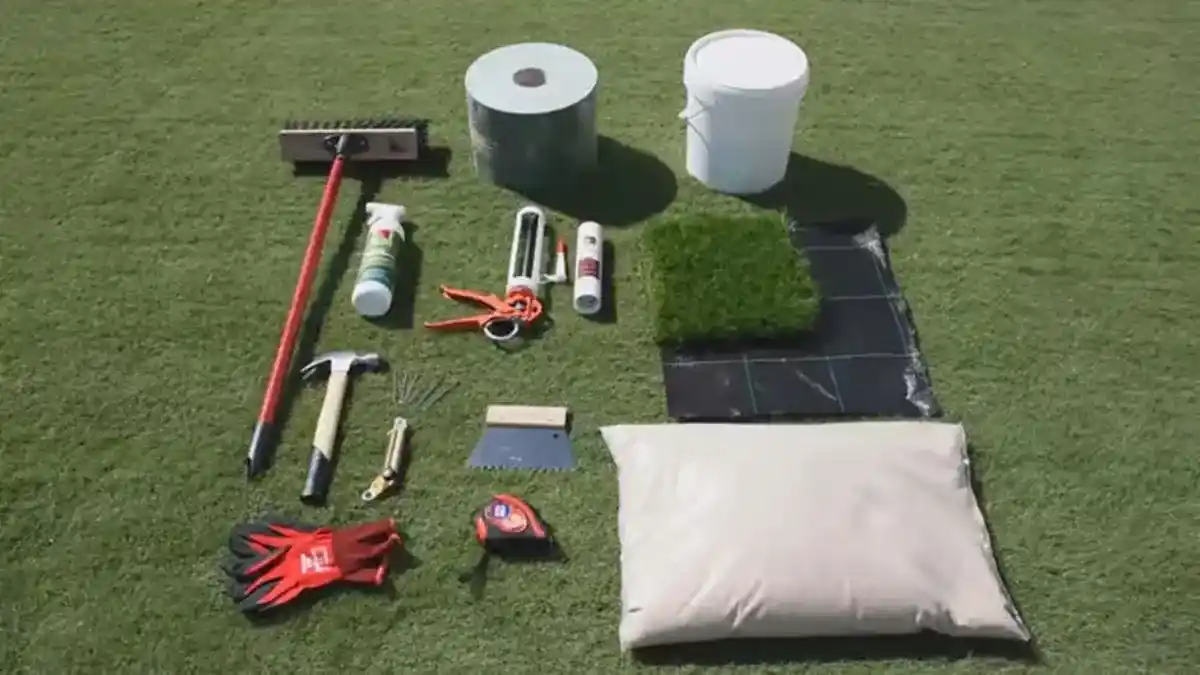
Tools and Materials You Will Need
Starting any project without the right tools can turn a simple job
into a frustrating experience. Before installing artificial grass, make sure you gather the necessary tools and materials.
Essential Tools
- Shovel or turf cutter
- Wheelbarrow
- Rake
- Utility knife
- Hammer
- Tape measure
- Plate compactor (optional but helpful)
Materials Needed
- Artificial grass rolls
- Crushed stone or gravel base
- Landscape fabric (weed barrier)
- Joining tape and adhesive
- Turf nails or staples
- Sand infill (optional depending on turf type)
Preparing everything beforehand makes the installation process smoother and more efficient.
Step-by-Step Guide to Installing Artificial Grass
Step 1: Measure the Area
The first step toward a perfect lawn begins with accurate measurements. Before buying artificial grass, measure the length and width of the installation area carefully.
Make sure to:
- Measure the total square footage
- Add extra material for trimming edges
- Consider obstacles like trees, pathways, or garden beds
Accurate measurements help reduce waste and ensure the turf fits perfectly.
Step 2: Remove Existing Grass and Soil
A strong foundation starts by clearing out the old lawn completely. Remove all natural grass, weeds, and about 2–3 inches of topsoil from the area.
This step is essential because:
- It prevents weeds from growing under the turf
- Creates space for the base layer
- Ensures proper drainage
You can use a shovel or turf cutter to make this process easier.
Step 3: Install a Base Layer
Think of the base layer as the backbone of your artificial lawn. A solid base ensures stability, drainage, and long-term durability.
Spread crushed stone, gravel, or decomposed granite across the cleared area.
Steps to follow:
- Spread 2–3 inches of base material
- Use a rake to level the surface
- Compact the base using a plate compactor or hand tamper
A properly compacted base prevents uneven surfaces and increases the lifespan of the turf.
Step 4: Add a Weed Barrier
Nobody wants weeds popping through their beautiful artificial lawn. Installing a weed barrier fabric helps stop unwanted plant growth.
Benefits of weed barriers:
- Prevent weeds from growing
- Improve drainage
- Protect the turf base
Roll the fabric across the entire area and secure it using landscape staples.
Step 5: Lay the Artificial Grass
Now comes the exciting moment—laying down the artificial grass. Roll out the turf across the prepared area and allow it to settle for a few hours.
Tips for proper placement:
- Ensure the grass fibers face the same direction
- Align edges neatly
- Avoid wrinkles or folds
Letting the turf sit for a while allows it to relax and makes cutting easier.
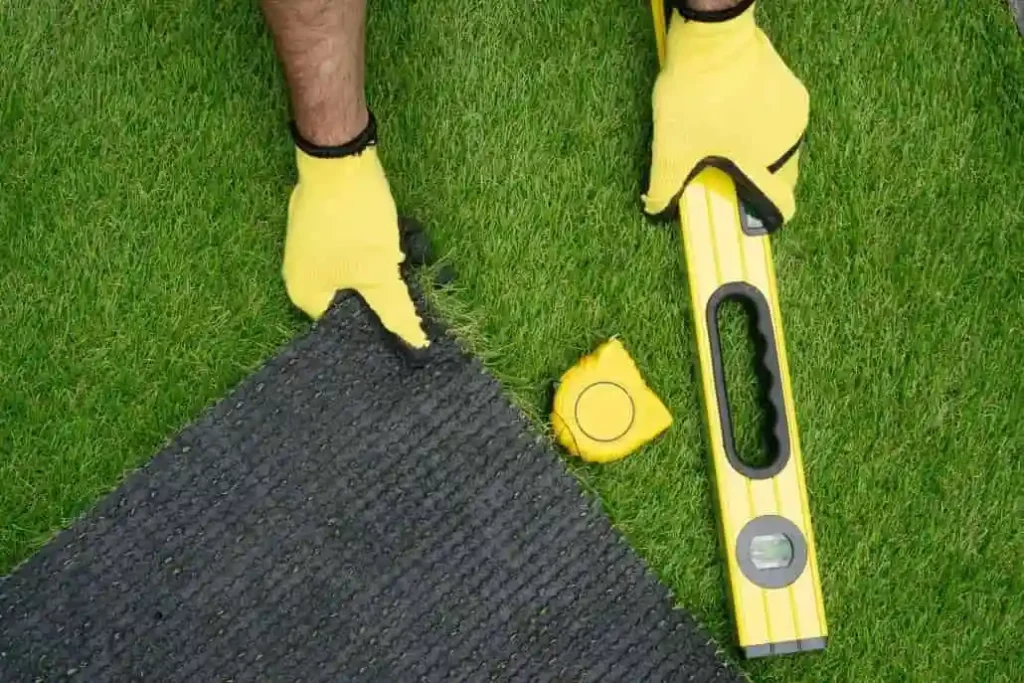
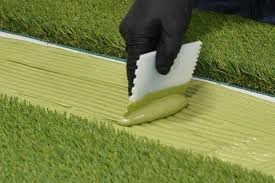
Step 6: Trim and Join the Turf
Perfect edges are what make an artificial lawn look professional. Use a sharp utility knife to trim the edges carefully around borders, walls, or pathways.
If multiple turf pieces are needed:
- Place joining tape between seams
- Apply turf adhesive
- Press both pieces firmly together
Proper seam joining ensures the lawn looks natural and seamless.
Step 7: Secure the Turf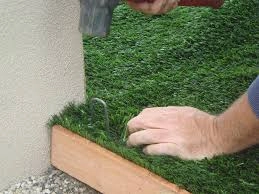
Without proper anchoring, even the best turf installation may shift over time. Secure the edges using turf nails or landscape staples every 6–8 inches.
Focus on:
- Edges of the lawn
- Seams between turf pieces
- Corners and curves
This step keeps the turf stable and prevents movement.
Step 8: Add Infill and Brush the Grass
The final touch transforms artificial turf from flat fabric into a realistic lawn. Spread sand infill across the turf to support the grass fibers.
Benefits of infill include:
- Helps grass blades stand upright
- Improves durability
- Provides a natural feel underfoot
Use a stiff broom or power brush to distribute the sand evenly and fluff up the grass.
How Long Does Artificial Grass Installation Take?
If you’re wondering whether this project will take days or weeks, the answer might surprise you. For most residential spaces, artificial grass installation can be completed in one to two days, depending on the size of the area.
Professional installers often complete the process even faster due to specialized tools and experience.
Maintenance Tips After Installation
Even though artificial grass requires less maintenance than natural lawns, a little care goes a long way.
Here are some simple maintenance tips:
- Remove leaves and debris regularly
- Rinse the turf occasionally with water
- Brush the grass fibers to keep them upright
- Clean pet areas to prevent odors
Artificial grass typically lasts 15–20 years with proper care, making it a long-term investment for homeowners.
FAQs
1. Can beginners install artificial grass themselves?
Yes, beginners can install artificial grass with proper tools and preparation. Following a step-by-step guide makes the process manageable even without professional experience.
2. How much does artificial grass installation cost?
Costs vary depending on the turf quality and area size. On average, installation can range from $5 to $15 per square foot including materials and labor.
3. Do you need a base layer for artificial grass?
Yes, a base layer of gravel or crushed stone is necessary to provide stability, proper drainage, and a smooth surface for the turf.
4. Does artificial grass require maintenance?
Artificial grass requires minimal maintenance. Occasional cleaning, brushing, and debris removal help keep it looking fresh.
5. Can artificial grass be installed on concrete?
Yes, artificial grass can be installed on concrete surfaces. However, a foam underlay or padding is usually recommended for comfort and drainage.
Conclusion
Installing artificial grass may seem like a big project at first, but with the right approach, it becomes a manageable and rewarding DIY task. By preparing the ground properly, laying a strong base, and securing the turf correctly, beginners can achieve professional-looking results.
With its durability, low maintenance, and year-round greenery, artificial grass offers a practical solution for modern outdoor spaces. Whether you are upgrading your backyard or decorating a balcony, artificial turf can transform any area into a beautiful and functional landscape.