DIY Bed Frame – Step-by-Step Guide to Build Your Own at Home
There’s something genuinely satisfying about sleeping in a bed you built with your own hands. A DIY bed frame is one of the smartest home projects you can take on. It saves you serious money, lets you customize every detail, and results in a piece of furniture that’s built to last. Not just because it saves you money, though it absolutely does, but because every time you walk into that room, you see something that didn’t exist before you made it happen.
I get it, though. The idea of building a DIY bed frame can feel intimidating at first. You picture complex joinery, power tools you don’t own, and lumber that ends up warped or uneven. But here’s the truth: a solid, beautiful DIY bed frame is one of the most beginner-friendly woodworking projects out there. With a little patience and the right guidance, you’ll have something that store-bought furniture simply can’t match: a piece made exactly to your taste, your room, and your budget.
This guide walks you through everything. Whether you’re a total beginner or someone who’s dabbled in woodworking before, by the time you finish reading this, you’ll know exactly how to build a DIY bed frame that’s sturdy, stylish, and something you’ll actually be proud of.
Why Build Your Own DIY Bed Frame?
Before we get into the how, let’s talk about the why, because honestly, the reasons are compelling enough to push past any hesitation you might have.
It saves you serious money
A decent bed frame from a furniture store will run you anywhere from $300 to over $1,000, depending on the size and style. A DIY version with quality lumber? You’re often looking at $100 to $250. That’s a significant difference, especially if you’re furnishing a whole room or working with a tight budget.
You get exactly what you want
Store-bought beds come in standard sizes with limited customization. When you build your own DIY bed frame, you control everything: the height, the headboard design, whether it has storage drawers underneath, the finish color, and the wood type. You’re not settling for “close enough.” You’re building exactly what you pictured.
It’s built to last
Most affordable commercial bed frames use MDF, particle board, or cheap metal. A DIY bed frame built with solid pine, oak, or even reclaimed wood will outlast almost anything you’d find at a big-box furniture store. Solid wood doesn’t warp, crack, or fall apart the way engineered wood does over time. For more on choosing the right materials, check out our guide on types of wood for furniture projects.
It’s genuinely enjoyable
There’s a kind of meditative focus that comes with working with your hands. Measuring, cutting, and assembling pulls you out of your phone and into something real. A lot of people who build their first DIY bed frame end up hooked on woodworking as a hobby.
Tools You Need for Your DIY Bed Frame

Let’s keep this practical. You don’t need a full workshop setup. Here’s what you’ll actually use:
Circular saw, or miter saw: For cutting lumber to size. A circular saw works fine; a miter saw gives you cleaner, faster cuts.
Power drill: The single most important tool. Used for pilot holes, countersinking, and driving screws.
Tape measure & square: Precision matters. A speed square keeps your corners at 90 degrees.
Clamps: Hold pieces together while the glue dries or while you drive screws. At least 4 clamps are ideal.
Sander or sandpaper: For smoothing rough edges. A random orbital sander speeds things up dramatically.
Pocket hole jig (optional): Makes strong, hidden joints. Highly recommended for a cleaner finished look.
Materials List for a Queen-Size DIY Bed Frame
The quantities below are for a standard queen bed (60″ × 80″). Adjust accordingly for twin, full, or king. For standard mattress sizes, reference the Sleep Foundation.
| Material | Quantity | Use |
|---|---|---|
| 2×6 pine boards (8 ft) | 4 boards | Side rails & end rails |
| 2×4 pine boards (8 ft) | 4 boards | Support slats & center rail |
| 4×4 posts | 4 pieces cut to height | Bed legs/corner posts |
| 1×6 boards (for slats) | 10–12 boards | Mattress support slats |
| Wood screws (3.5″) | 1 box | Mainframe assembly |
| Wood screws (1.5″) | 1 box | Slat attachment |
| Wood glue | 1 bottle | Extra joint strength |
| Sandpaper (80, 120, 220 grit) | Assorted | Smooth finish |
| Stain or paint + topcoat | 1 quart each | Finishing |
Pro tip: Buy your lumber from a local lumber yard rather than a bigbox store when possible. Always look for kiln dried lumber it’s properly dried and won’t warp after assembly.
Choosing Your Style and Size
Before you cut a single board, decide on your style. This shapes every decision that follows: the height, the joinery, the finish, and the headboard design.
Farmhouse / Rustic: Raw wood grain, visible knots, dark walnut or ebony stain. Pairs beautifully with linen bedding and natural textures.
Modern Minimalist: Clean lines, low profile, no headboard, or a simple slatted one. White or light grey paint. Scandinavian-inspired.
Platform Bed: Sits low to the ground, strong horizontal profile. Works without a box spring. Very popular and versatile.
Storage Frame: Drawers underneath for extra organization. Requires more planning but adds serious functionality to small bedrooms.
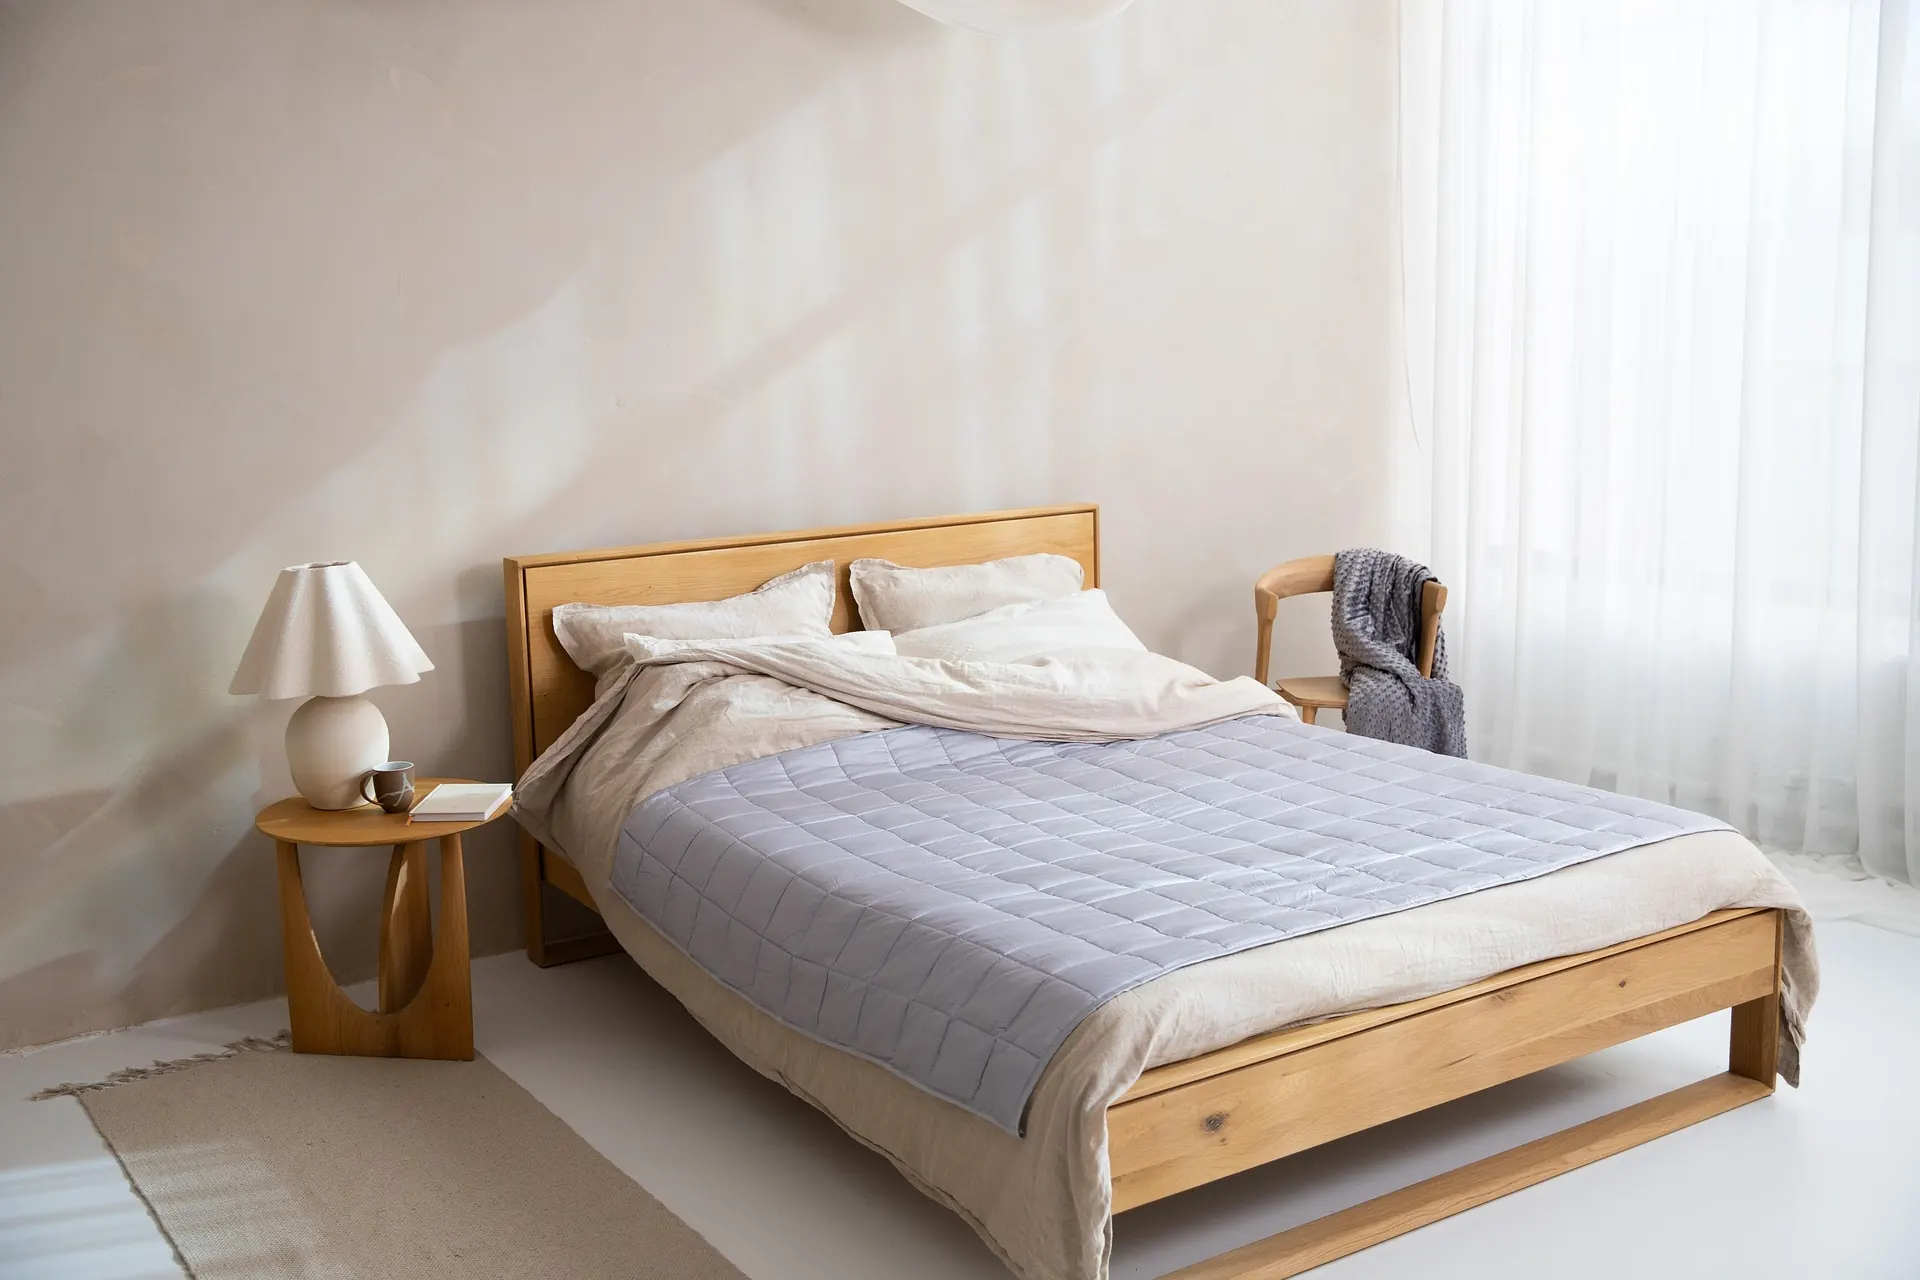
For this guide, we’ll walk through building a sturdy platform DIY bed frame. It’s the most popular style, works with any mattress, and is genuinely beginner-friendly.
Getting Your Measurements Right
Standard mattress sizes in the US: Twin (38″×75″), Full (54″×75″), Queen (60″×80″), King (76″×80″). Your frame’s interior dimensions should match these exactly — or add ½ inch to each side for a slight gap, which makes lifting the mattress in and out easier. Don’t go more than 1 inch larger, or your mattress will shift around.
DIY Bed Frame: Step-by-Step Building Guide
Alright, here’s where the real work begins. Follow these steps in order, and don’t rush any phase, especially the measuring. The old carpenter’s rule applies: measure twice, cut once.
Step 1: Cut Your Lumber to Size
Using your measurements, cut the two long side rails (for queen: 80″ long) and two shorter end rails (60″ long) from your 2×6 boards. Cut your legs to your desired height. Most bed frames sit 12–14 inches off the ground, but you can go lower for a platform look (7–8 inches) or higher for storage space underneath. Label each piece with painter’s tape so you don’t confuse them later.
Step 2: Build the Leg Assemblies
If you’re using 4×4 posts as legs, attach a 2×4 “ledger board” to the inside face of each leg. This is what your side rails will rest on. Position the ledger so the top of your rail will sit at the right height. Use wood glue and 3″ screws to secure them. Do this for all four legs. Let the glue set for at least 30 minutes before proceeding.
Step 3: Assemble the Outer Frame of Your DIY Bed Frame
Lay your side rails and end rails on a flat surface and connect them at the corners. Drill pocket holes using your jig, or drill pilot holes straight through the end rail into the side rail. Apply wood glue at each joint, then drive your 3.5″ screws. Use a square to check that each corner is perfectly 90 degrees before the glue sets. This step is critical; a frame that’s even slightly out of square will cause problems later.
Step 4: Attach the Legs
With your rectangular outer frame assembled, it’s time to attach the legs at each corner. Stand the frame upright, position a leg at each corner, and clamp it in place. Drive screws through the rail and into the leg on two sides. For extra strength, add a metal corner bracket on the inside. Check that the frame sits level; if one leg is slightly off, a quick sand or small shim will solve it.
Step 5: Add the Center Support Rail
A center support rail running the length of the bed is non-negotiable, especially for queen and king sizes. Without it, your mattress and your sleep will sag in the middle. Cut a 2×4 to fit between your headboard and footboard rails, and add one or two center legs to support it. Attach it with pocket screws or metal joist hangers for a super solid connection.
Step 6: Install the Slats
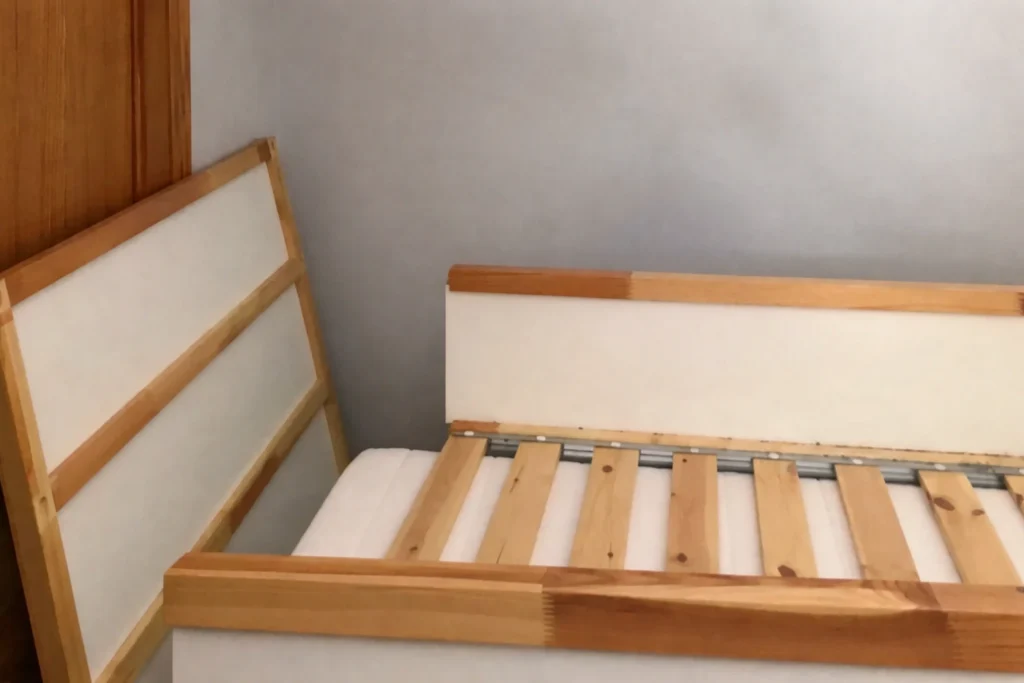
Cut your 1×6 boards to span across the width of your frame (60″ for queen). Space them evenly, no more than 3 inches apart for proper mattress support. Most beds need about 10–14 slats. Pre-drill and screw each slat into the side rails, or simply rest them on the ledger boards if you’ve built it that way.
Step 7: Build and Attach Your Headboard
A simple headboard is just a panel of 1×6 or 1×8 boards cut to your desired height (typically 24–48 inches) and arranged vertically or horizontally. Attach them to a backing board, then secure the whole panel to the two headboard legs with heavy-duty screws. For a full walkthrough, check out our guide on how to build a headboard.
Finishing Your DIY Bed Frame
This is where your bed frame goes from “a nice piece of wood furniture” to “something that genuinely looks designed.” Don’t skip the finishing phase; it’s the difference between a project that looks homemade and one that looks intentional.
Sanding properly: Start with 80-grit sandpaper to remove any rough spots. Work up to 120-grit, then finish with 220-grit for a silky-smooth surface. Sand in the direction of the wood grain, never across it. Wipe down with a tack cloth between grits to remove dust. For detailed wood finishing tips, visit Bob Vila’s wood finishing guide.
Stain vs. paint: Stain lets the wood grain show through and gives a warm, natural look. Dark walnut stain on pine creates a rich, almost mid-century feel. Apply with a rag in long strokes, let it penetrate for a few minutes, then wipe off the excess. Apply a polyurethane topcoat for protection. Paint covers the grain entirely and is great if you want a bold, modern look.
Design tip: Try a mix paint the main frame white and stain the headboard dark walnut. That contrast gives the room a curated, designer feel.
Hardware details that elevate the whole piece: Brass or matte black bolts instead of hidden screws. Hairpin legs instead of chunky wood posts. A leather strap handle on a storage drawer. These small finishing choices are what make the difference between a bed frame that looks DIY and one that looks like it belongs in a design magazine. For inspiration, browse our bedroom furniture ideas
Common Mistakes to Avoid When Building a DIY Bed Frame
Not checking for square: A frame even slightly out of square will look off, and your mattress won’t sit right. After every assembly step, measure corner to corner diagonally; equal diagonal measurements mean you’re perfectly square.
Skipping pilot holes: Driving screws into wood without pre-drilling causes splitting, especially near the ends of boards. Always pre-drill.
Using green or wet lumber: Lumber that isn’t properly dried will warp and crack as it dries in your room. Always use kiln-dried wood.
Slat spacing too wide: Anything more than 3 inches between slats risks mattress sag. When in doubt, add more slats; they’re cheap insurance.
Rushing the finish: If you apply stain or paint before the wood is fully sanded and clean, the finish will look blotchy. Take the time to prep properly.
Cost Breakdown
| Category | Budget Build | Mid-Range Build | Premium Build |
|---|---|---|---|
| Lumber (pine) | $60–80 | $80–110 | $150–200 (oak/walnut) |
| Hardware & screws | $15–20 | $25–35 | $40–60 |
| Finish (stain/paint) | $20–30 | $35–50 | $50–80 |
| Sandpaper & supplies | $10–15 | $15–20 | $20–30 |
| Total | $105–145 | $155–215 | $260–370 |
Budget hack: Check Facebook Marketplace, Craigslist, and Habitat for Humanity ReStores for reclaimed lumber or leftover building materials. Pallet wood bed frames have beautiful rustic character and can cost almost nothing in materials.
The Ultimate DIY Bedroom Transformation: Build Your Bed Frame, Style Your Space
Your bedroom should work as hard as you do. Whether you’ve recently decided to ditch your Planet Fitness membership and bring your workouts home, or you’re simply tired of a cluttered, uninspired room, the answer might be simpler than you think: a DIY bed frame. Built right, it becomes the backbone of a bedroom that’s part home gym, part vintage sanctuary, and part seasonal showpiece.
Why a DIY Bed Frame Changes Everything
Most people underestimate how much the bed frame shapes a room. It’s the largest piece of furniture you own, and yet most store-bought frames ignore storage, style, and flexibility entirely. When you build your own, you decide the height, the finish, the headboard shape, and crucially, how much space lives underneath. That space is where this whole transformation begins.
From Planet Fitness to Your Own Four Walls
If you’ve recently changed or cancelled your home gym at Planet Fitness, you’re not alone. Thousands of people are reclaiming their fitness routines at home, and the bedroom is often the most convenient space. The challenge is that fitness accessories, such as resistance bands, dumbbells, yoga mats, foam rollers, jump ropes, have nowhere logical to live. They end up on the floor, in corners, or buried in closets.
A DIY platform bed frame solves this immediately. Build it with 10 to 12 inches of clearance underneath, add a few shallow pull-out bins or open shelving along the sides, and every piece of fitness accessories for home has a dedicated, hidden home. Your bedroom stays clean. Your gear stays accessible. And your morning workout routine becomes frictionless because everything is exactly where you left it.
DIY Home Decor Ideas That Start With the Frame
Once the structure is sorted, the creative work begins. The bed frame is your canvas. DIY home decor ideas that once felt disconnected, painted headboards, macramé wall hangings, woven textiles, reclaimed wood shelves, suddenly have an anchor point. Everything hangs off the frame, literally and visually.
For the headboard, consider a panelled design using tongue-and-groove timber, painted in a muted clay or sage tone to bring warmth into the room. Add open shelving to either side of the headboard for books, plants, and small lamps. The frame itself can be stained in a deep walnut finish or left raw and sealed for a Scandinavian look. These are not expensive choices; they are intentional ones, and that is exactly what makes DIY home decor feel elevated rather than cheap.
Vintage Home Accessories: Timeless Style Meets Handbuilt Structure
One of the most rewarding things about building your own bed frame is that it pairs beautifully with vintage home accessories. A wrought-iron canopy added to a simple wooden frame, antique brass drawer handles on under-bed storage bins, and a reclaimed headboard sourced from an old door or shutter. These touches are impossible to replicate with flat-pack furniture. Still, they slot naturally into a hand-built piece.
Vintage decor works because it carries history and texture. When you pair it with a raw, honest DIY frame, the room stops looking like a showroom and starts feeling like somewhere real. Consider sourcing vintage mirrors, ceramic lamps, and linen throws to complete the look. These accessories do not need to match; they need to belong, and a well-built bed frame gives them somewhere to belong.
Decorating Your Bedroom for Christmas: The Frame as a Seasonal Feature
One often-overlooked opportunity is the bed frame as a seasonal decor anchor. At Christmas, the bedroom is one of the most satisfying rooms to transform, and a DIY headboard gives you a ready-made structure to work with. Drape warm fairy lights along the top rail. Hang a small wreath on the headboard. Layer the bed with deep red, cream, and green textiles that echo the palette outside.
Because you built the frame yourself, you know exactly where to add small hooks, cable clips, or recessed channels for lighting. A manufacturer imposes no limitations. Decorating your home for Christmas starts in the rooms where you begin and end each day, and a bedroom that feels considered and handmade absorbs seasonal styling with far more grace than a generic divan ever could.
Final Thoughts on Building a DIY Bed Frame
Building your own DIY bed frame is one of those projects that rewards you twice: once while you’re building it, and again every single time you sleep in it. You made that. With your own hands, from raw wood.
The techniques in this guide translate to countless other furniture projects, too. Once you’ve built a DIY bed frame, a coffee table, a bookshelf, and a dining bench, all follow the same logic. You’re not just building a piece of furniture, you’re building a skill set. Check out our how-to-stain-wood guide to take your finishing skills even further.
So clear out a corner of your garage, put on a good podcast, and start measuring. Your best night’s sleep is literally a weekend project away.
Learn more about home essentials and DIY tips at newhomeessentials.com
Frequently Asked Questions
1. Do I need woodworking experience to build a DIY bed frame?
No experience needed. Building a DIY bed frame is one of the most beginner-friendly projects out there. If you can measure accurately and use a drill, you have everything it takes to get started.
2. What is the best wood to use for a DIY bed frame?
Pine is the best choice for most people — it’s affordable, easy to work with, and looks great stained or painted. For a premium build, go with oak or maple. Always avoid MDF and particle board; they don’t hold screws well over time.
3. How long does it take to build a DIY bed frame?
Most people finish a basic frame in one weekend. Day one is cutting and assembly (3–5 hours). Day two is sanding and finishing (2–3 hours, plus drying time).
4. Is it cheaper to build a DIY bed frame than to buy one?
Yes significantly. A DIY queen frame costs around $100–$215 in materials. A comparable solid-wood frame from a store starts at $400 and often goes much higher.
5. What is the most common beginner mistake when building a DIY bed frame?
Not checking for square during assembly. After joining each section, measure diagonally from corner to corner; equal measurements mean you’re perfectly square. Also, never rush the finish.